- Guide to running Corrade in Google Cloud Platform
- Table of contents
- Signing up for Google Cloud Platform
- Setting up a micro instance to run a Corrade container
- Create Instance
- Machine Configuration panel
- OS and storage panel
- Networking panel
- Setting Corrade Nucleus password
- Setting a static IP address
- Allowing access to Nucleus from only your own IP address
- Configure Corrade
#Guide to running Corrade in Google Cloud Platform
#Table of contents
- Signing up for Google Cloud Platform
- Setting up a micro instance to run a Corrade container
- Configuring Corrade for use with Allomancy
#Signing up for Google Cloud Platform
Simply navigate to cloud.google.com and click the “Get started for free” button. Return to this guide when you have set up GCP and are ready to set up your first container instance.
#Setting up a micro instance to run a Corrade container
In this section we are going to use a micro Compute Engine instance to run Corrade in a so called container. A container is an encapsulation of everything a given software needs, and almost nothing else. This makes it both easier to manage and more secure.
#Create Instance
- Navigate to Compute Engine/VM instances and click
Create Instance.

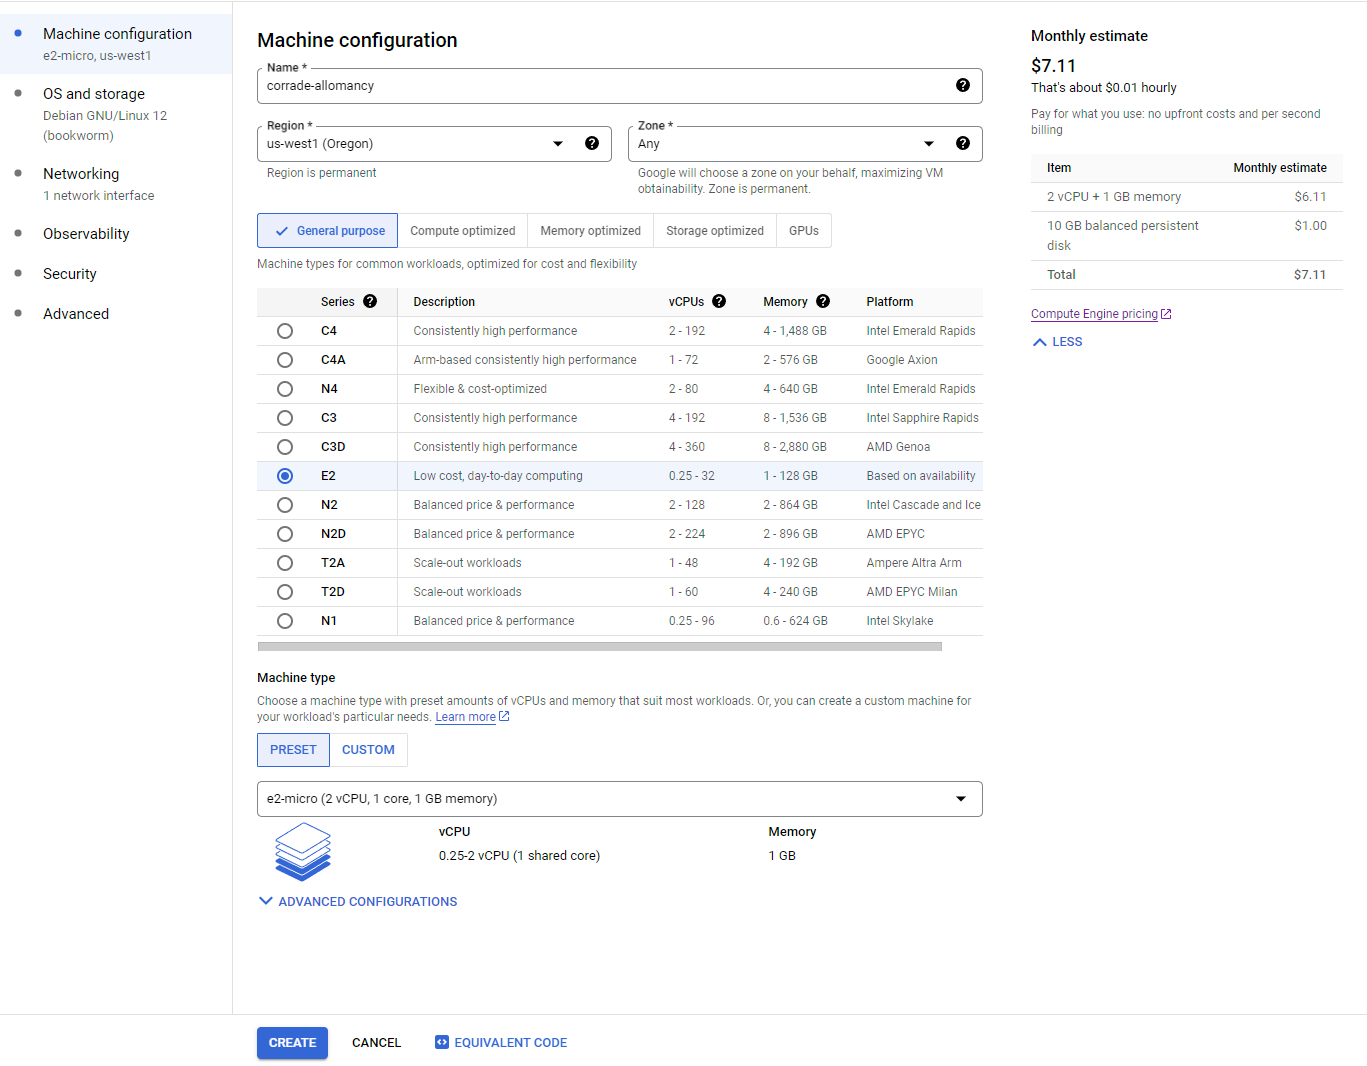
#Machine Configuration panel
- Set name, for example
corrade-allomancy - Set region to
us-west1 - Leave machine series at
E2 - The Machine type should be
e2-micro(under the Shared-core group) - Do NOT click
Createbut click OS and Storage in the menu on the left
#OS and storage panel
- Click Deploy Container at the bottom

- Paste
wizardrysteamworks/corrade:latestin Container image - Add a Volume mount
- Volume type
Directory - Mount path
/etc/corrade - Host path
/home/corrade/config - Mode
Read/write - Click Done
- Volume type
- Click Select

- Do NOT click
Createbut click Networking in the menu on the left
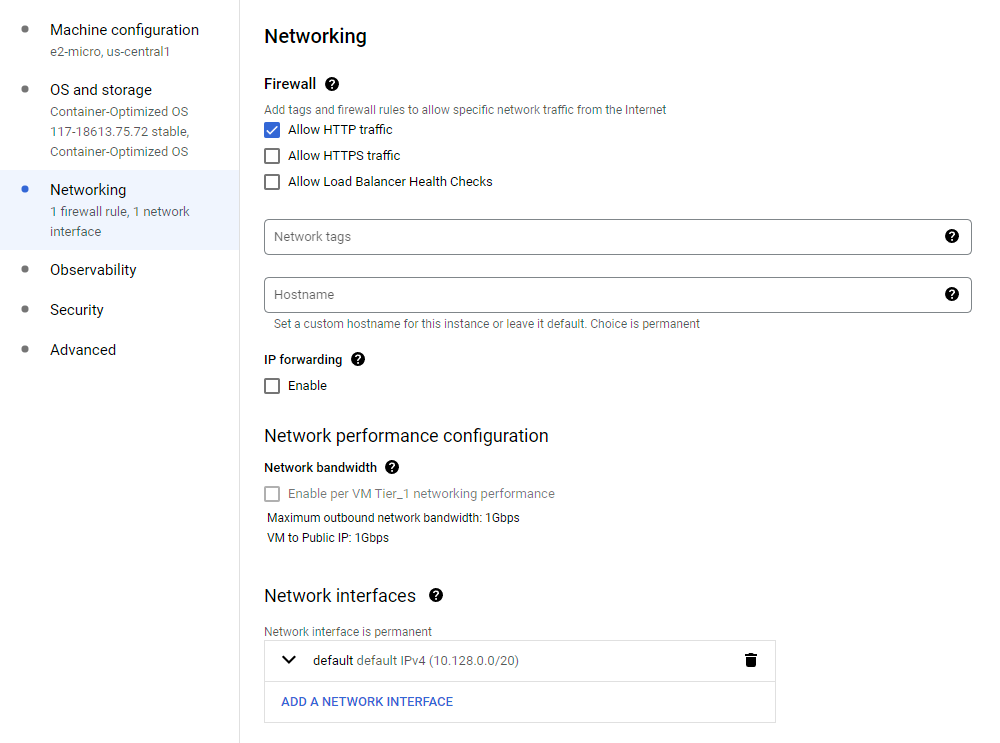
#Networking panel
- Check Allow HTTP traffic (not HTTPS)
- You can now click CREATE and wait until your container instance is running
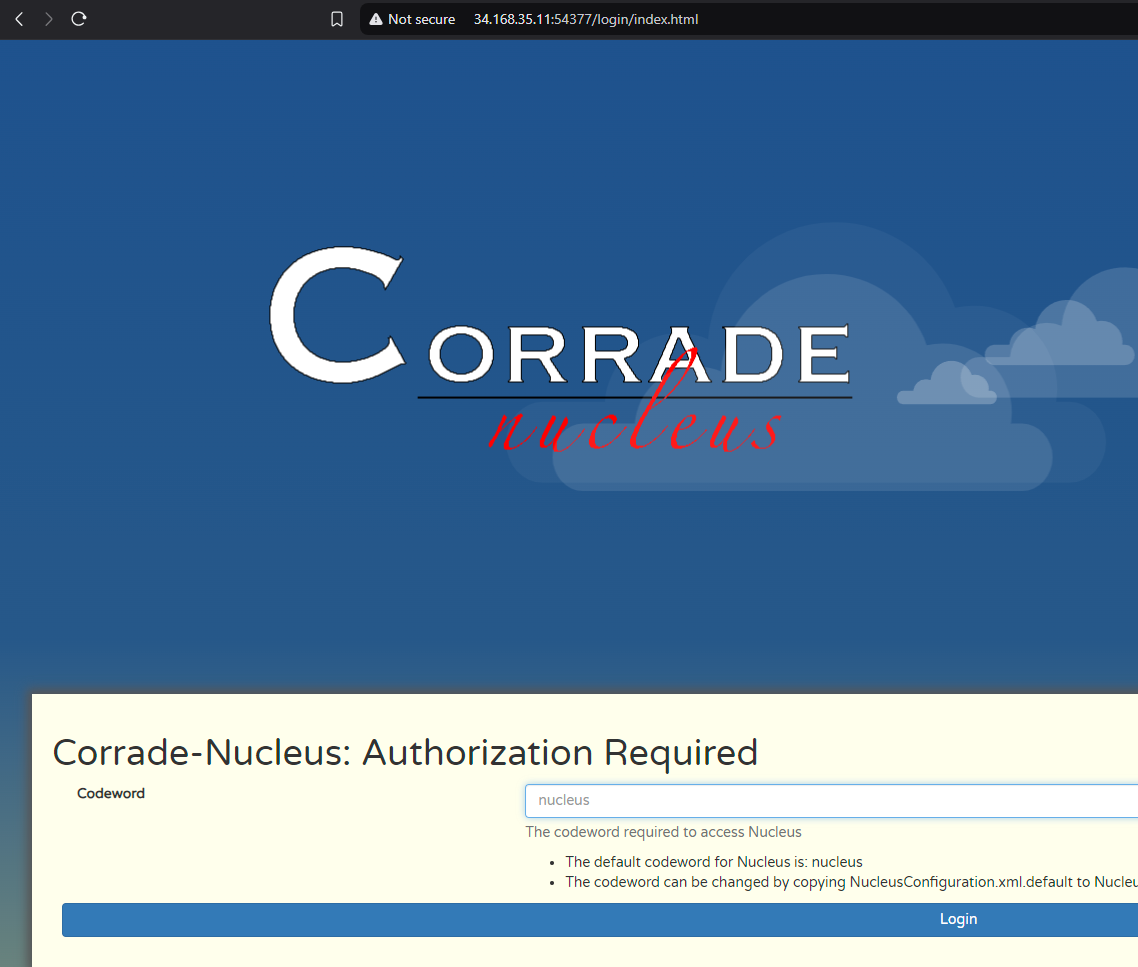
#Setting Corrade Nucleus password
- When your instance has started go to VM Instances and click where is says SSH at the end of the line of your new instance.

-
Click Authorize when it asks
-
Type the following commands
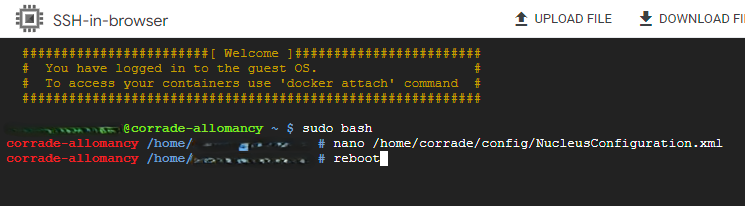
sudo bashnano /home/corrade/config/NucleusConfiguration.xml(if the file doesn’t exist, just wait a couple of minutes until the installation process is complete)
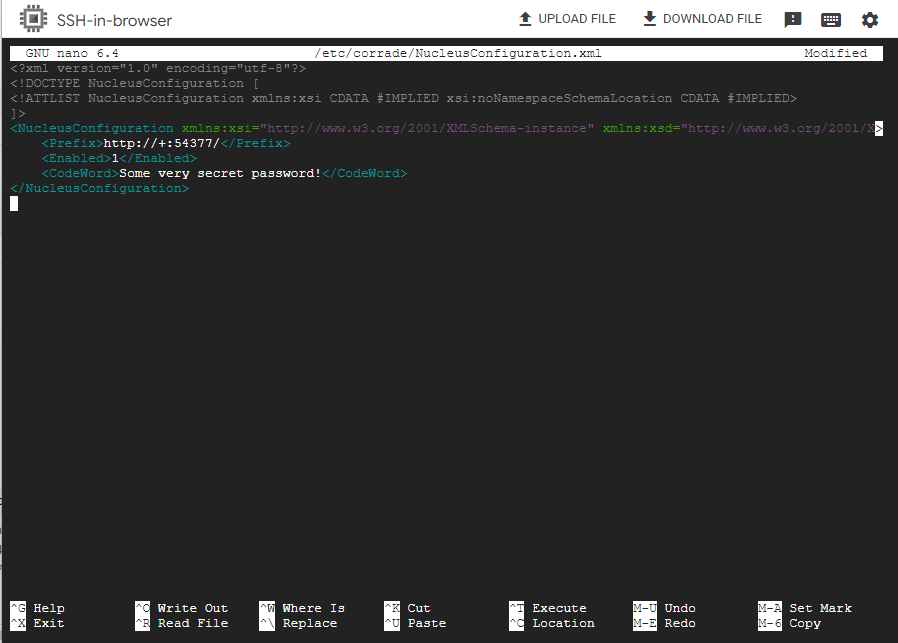
- Edit the file between the
<CodeWord>and the</CodeWord>tags. Leave the tags! Set a strong password. - Hit
ctrl-x - It asks if you want to save, answer
Yes - It asks for filename, just hit
Enter - Now reboot the instance for the changes to take effect by typing
reboot
#Setting a static IP address
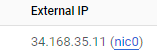
For Allomancy to be able to reach our bot, it needs to always have the same IP address, so we will make it static.
- Go back to VM Instances and click nic0 after the public IP address:
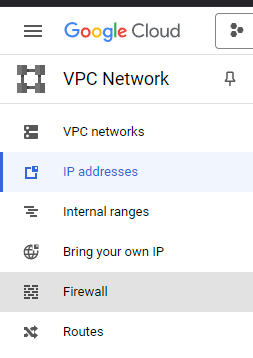
- Click the menu in the top left corner and chose IP addresses

- On the line with the public IP address, click the three dots under Actions and select Promote to Static IP address

- Give the IP address a name. This is just for internal use and not a DNS domain name.
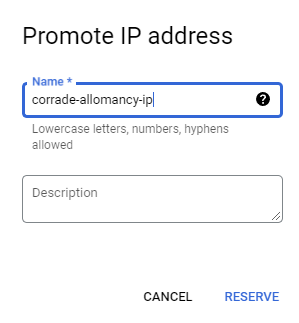
- Click RESERVE
#Allowing access to Nucleus from only your own IP address
We will now give our home IP address access to the Corrade configuration management. Every time your IP address changes, you will have to update this address
- In the menu in the top left, select Firewall, or click this link Firewall
- At the top, click Create Firewall Rule (NOT “Create Firewall Policy”)

- Fill in Name
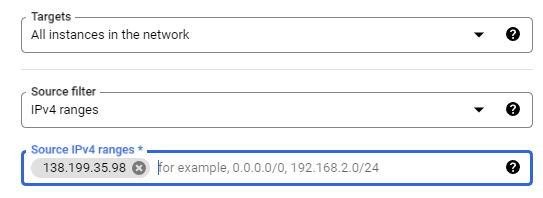
nucleus-from-home - Scroll down to Targets and select
All instances in the network - Open (in a new tab) What’s my IP
- Click the Copy icon behind My Public IPv4
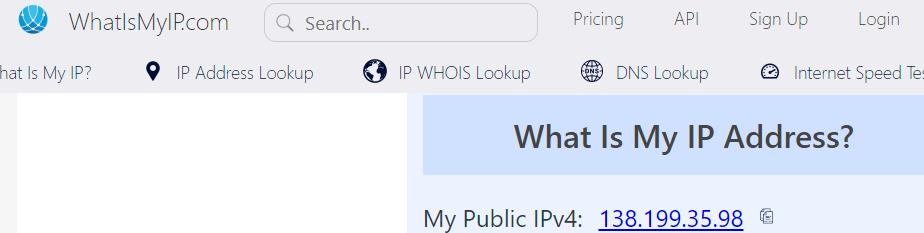
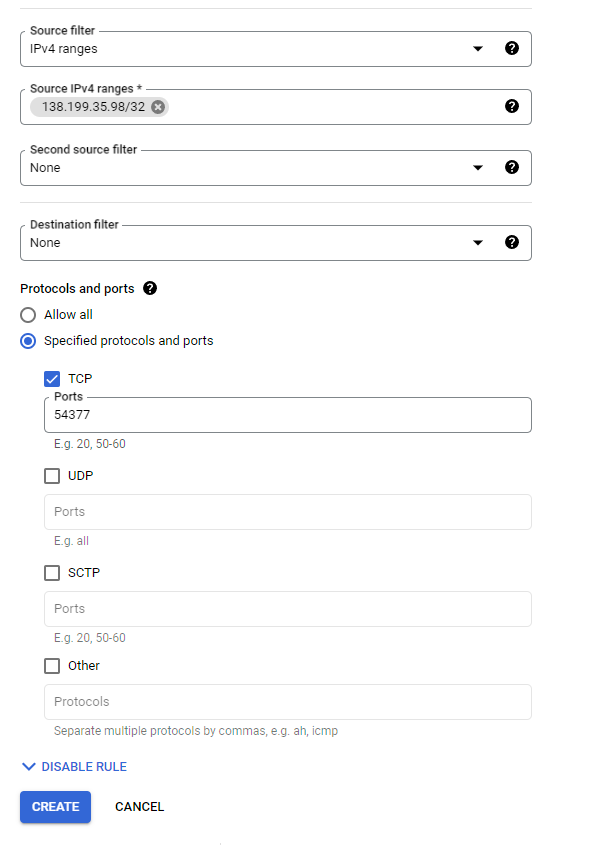
- Paste this address in Source IPv4 ranges and hit enter
- Scroll down to and select Specified protocols and ports
- Enable the TCP box, and paste
54377 - Click CREATE
#Configure Corrade
You should now be able to navigate to your bot’s configuration page. ONLY ACCESS THIS FROM A NETWORK YOU TRUST (anyone can sniff your password, it’s not encrypted) If you find yourself in need of encrypted access, you can look into setting up an SSH tunnel. You’ll need to add a SSH cert to your instance and have an ssh client installed on your computer. That’s out of scope for this guide though.
- Yet again go back to VM Instances and copy the external IP address
- Paste the address in your browser like so:
http://PASTE_IP_ADDRESS:54377/